Looking to spruce up your laundry area? Consider replacing your washing machine hookup box! With these simple steps, you can quickly Fix It Yourself! Follow along as I outline the simple steps to making that laundry room shine.
Take Out the Old Washer Box

On the setup in my house, I could access below where the pipes come into the washer box. If your valves on the top unscrew you can take them off there, or you can cut an access hole below and patch it back in after replacement.
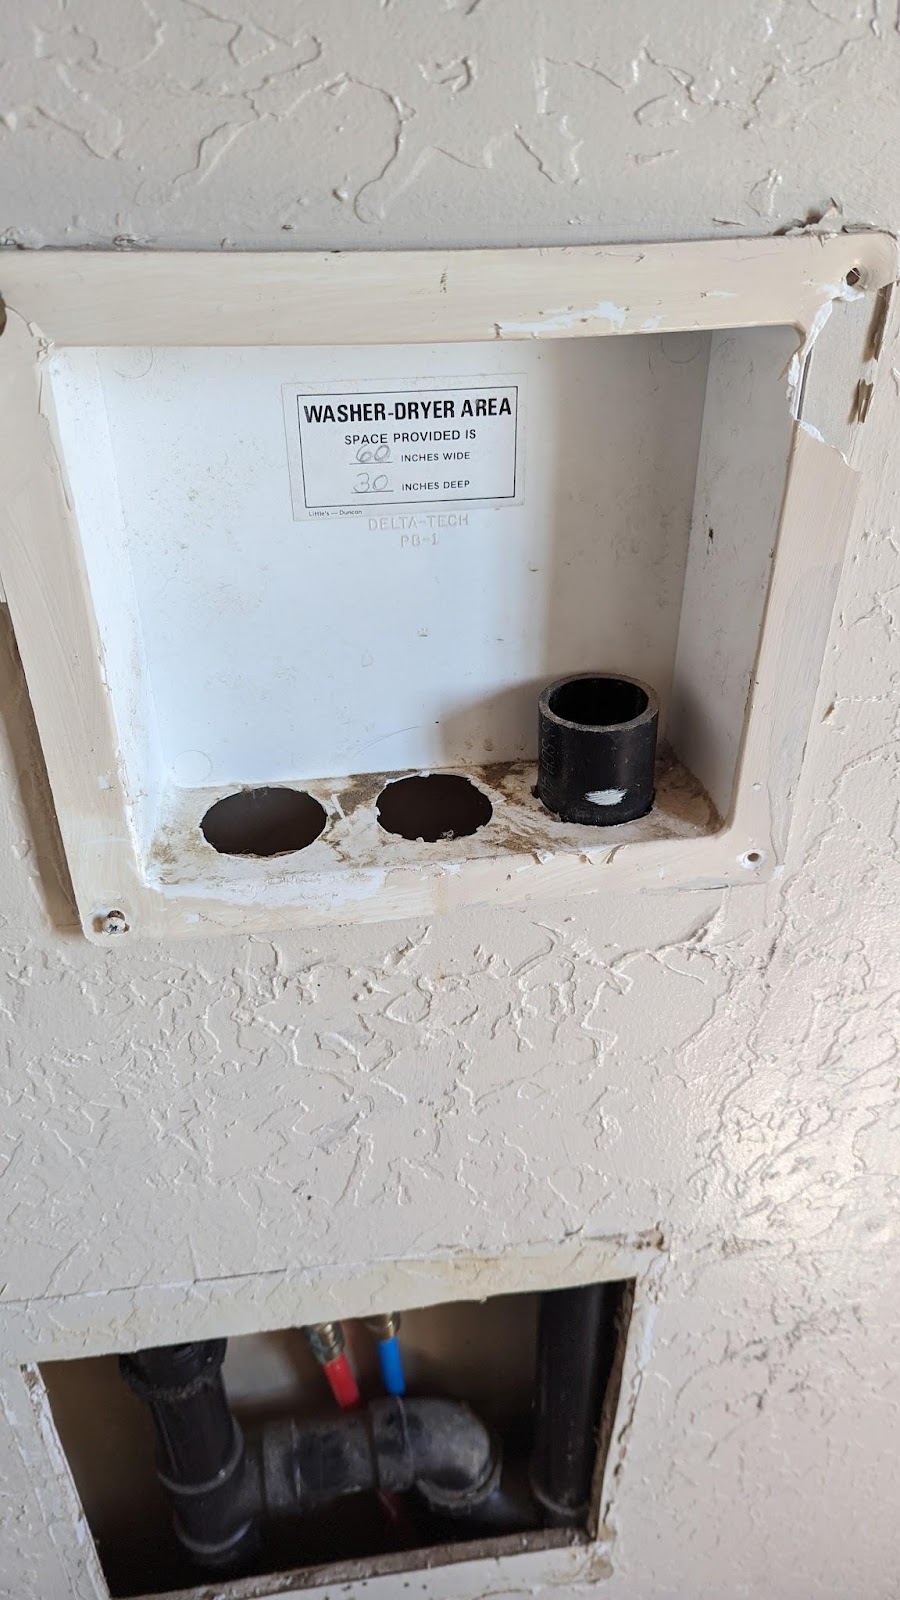
PEX plumbing is what is in my house. This is the industry standard for most homes today and it is very easy to install and replace for the average DIYer.
With these DIY Shark Bite fittings, I disconnected the old valves and pipes. next, I tore them out of the old washer box. I was now able to remove the washer box itself.
Prep for the New Washer Box
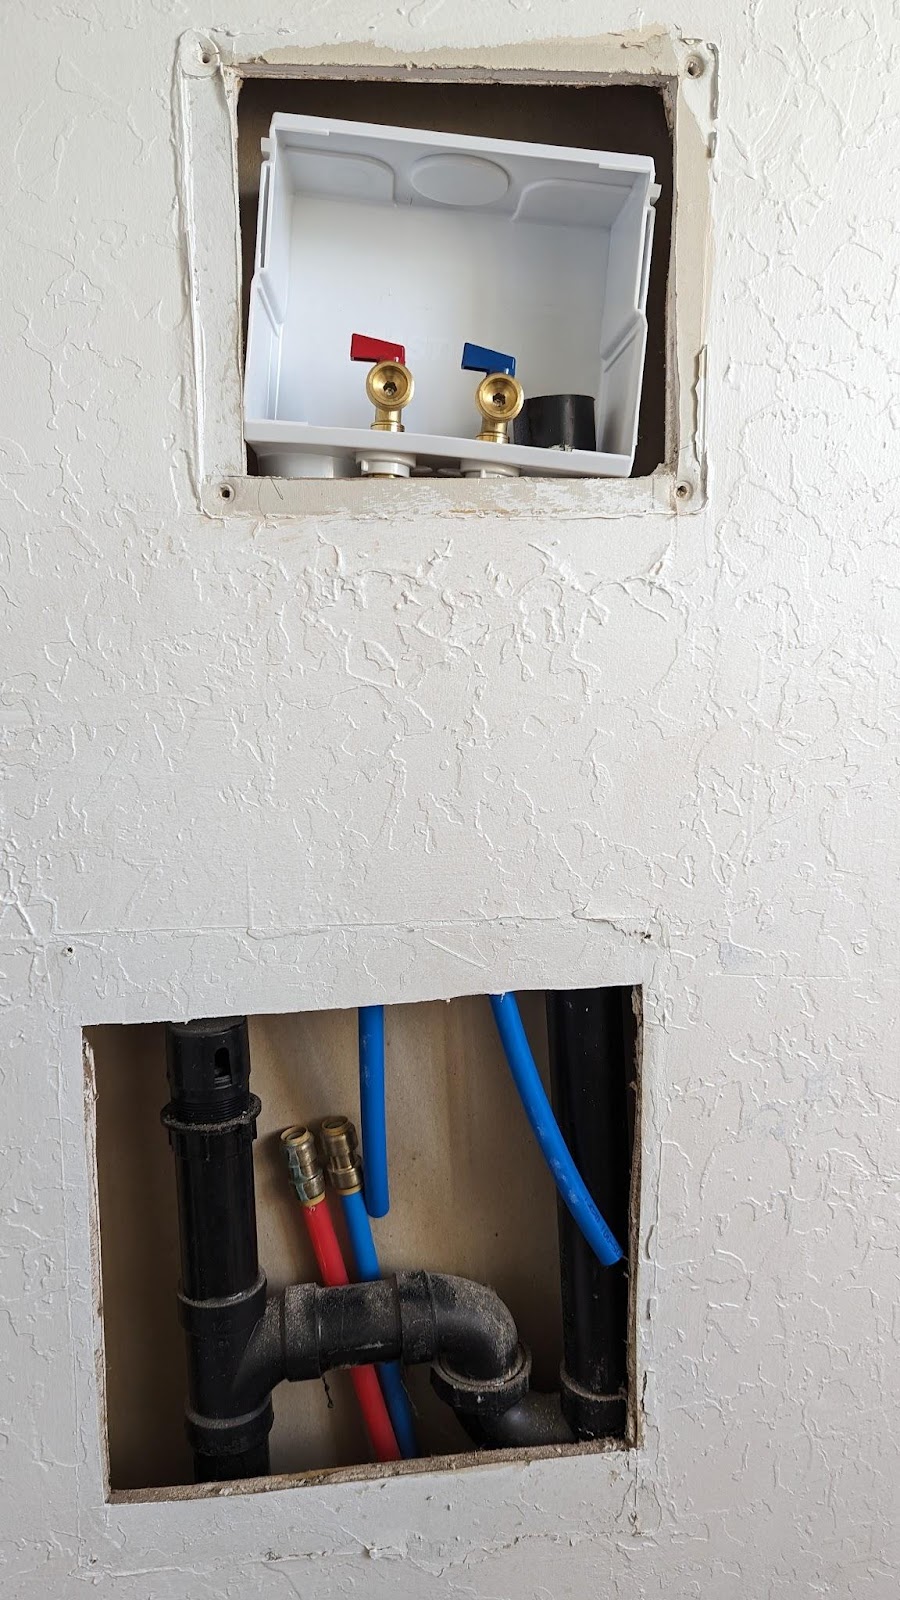
A new washer box is made for installation before the sheetrock is installed. I did not want to take all my sheetrock off to install a new washer box, so I found a simpler solution.
Once I opened my new washer box, I installed my PEX pipe onto the washer box. Next, I set the washer box in the wall.
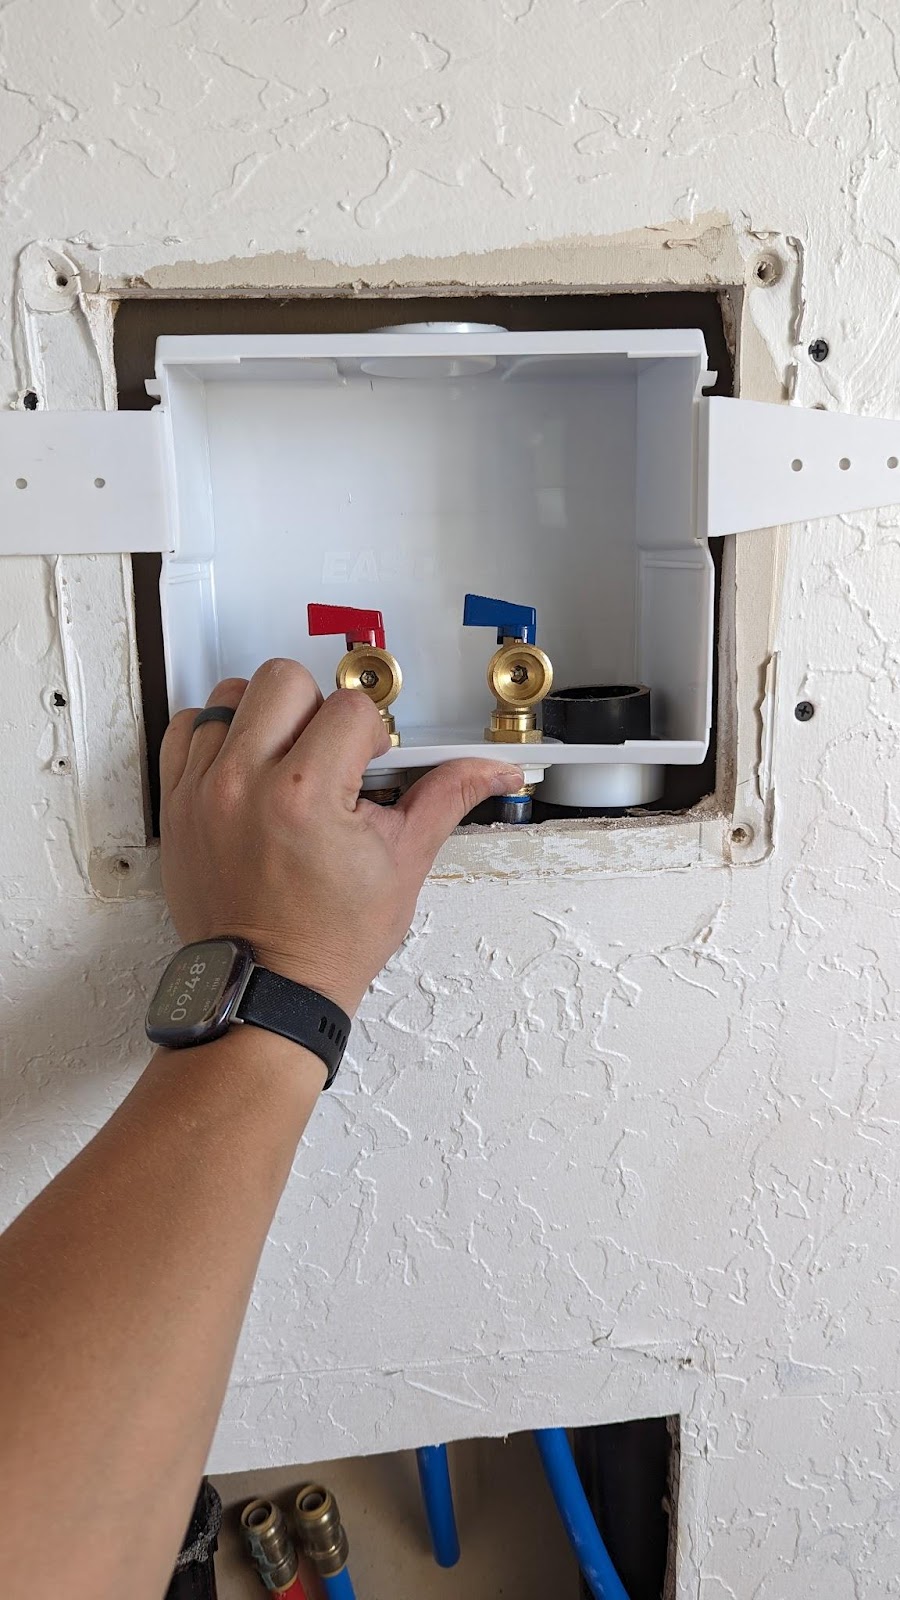
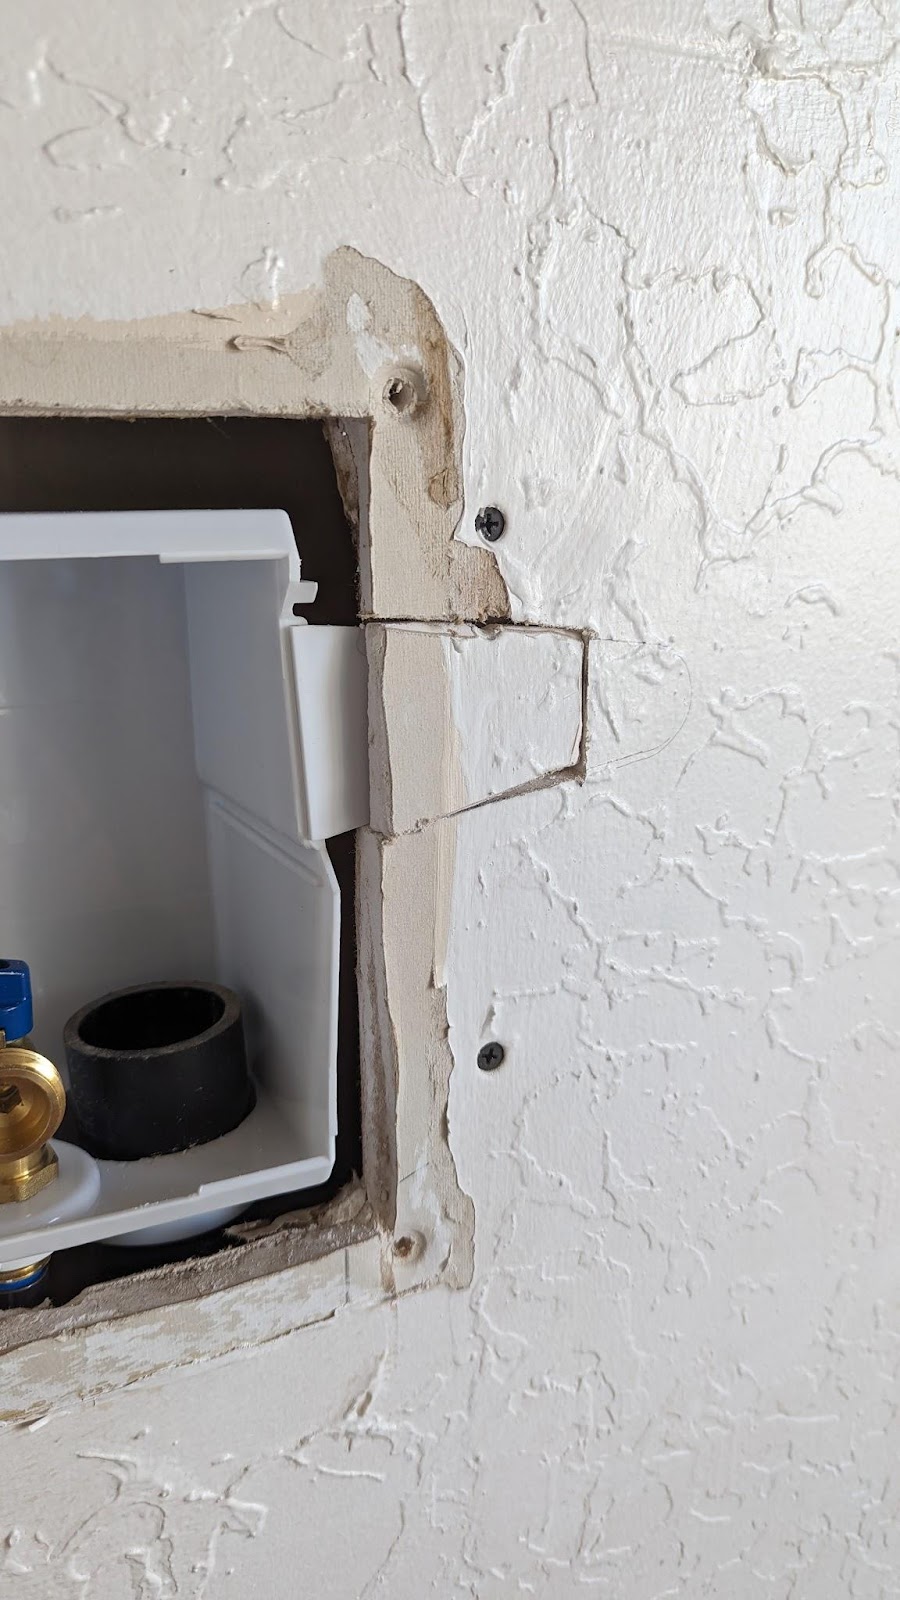
Next, I put the mounting tabs into the side slots. I hold the box up to the wall and make it look square.
Once square, I use a pencil to outline the mounting brackets on the sheetrock.

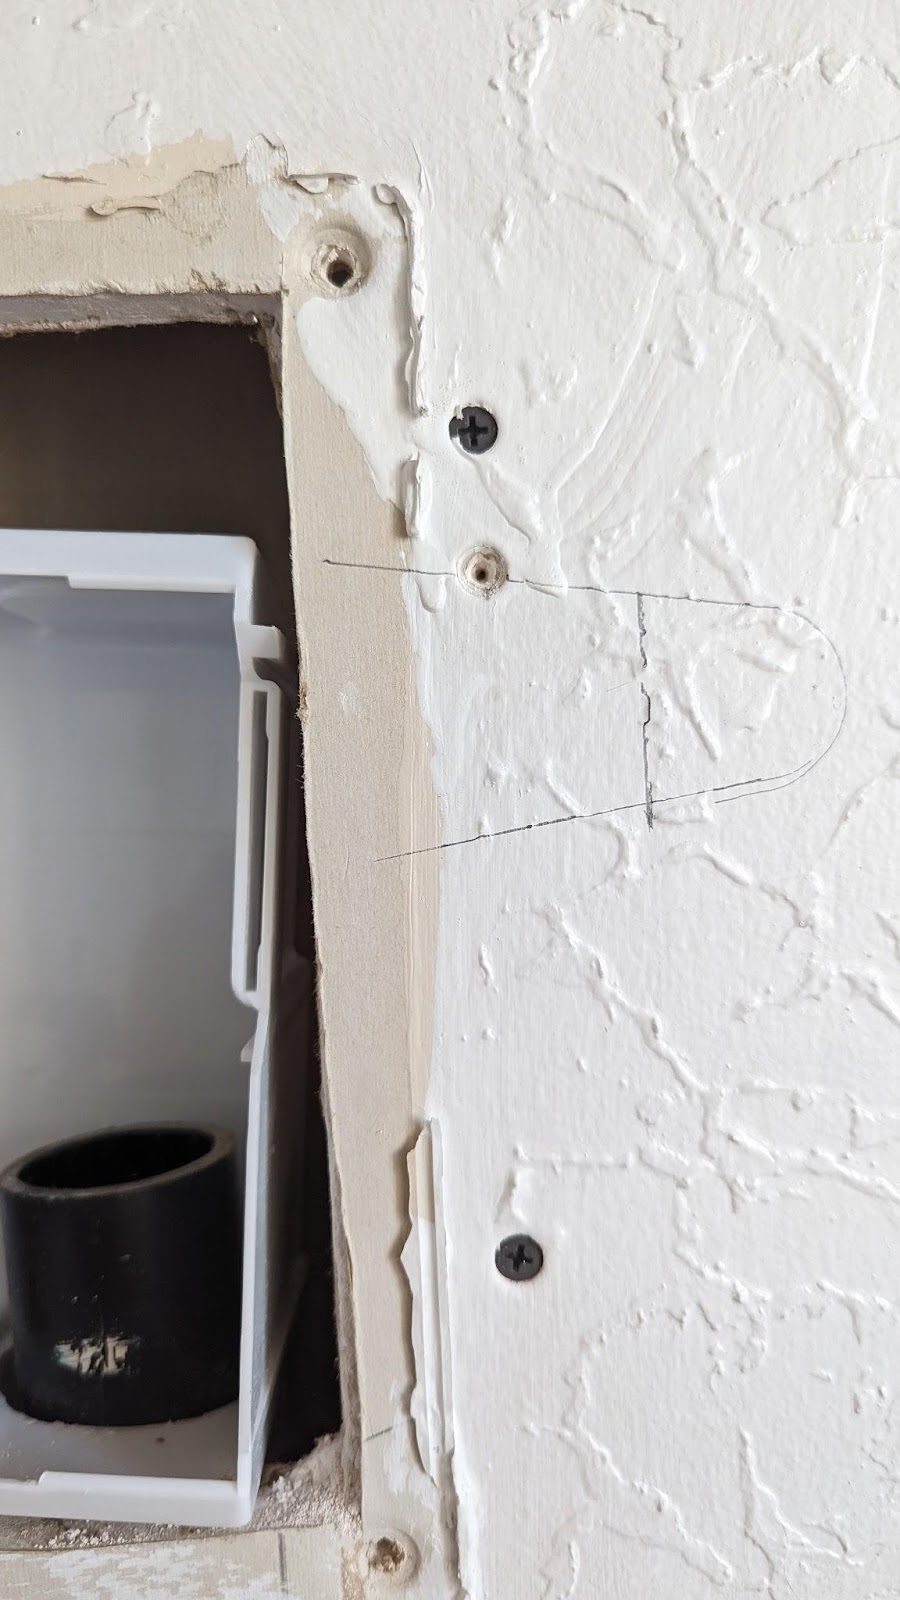
If you have one, use an oscillator multitool to cut out the penciled lines. (You can use a razor knife or sheetrock saw too.) Once they are cut out, you can take two small scraps of 1×4 about six inches long. Next slide them into the sides of the opening and fasten them with screws above and below the bracket marks.
Install the New Washer Box

At this point you can snap the brackets into the washer box slots, square up your box and screw it into your 1x4s inserted behind.
With the new washer box secure to the wall, you can now connect your plumbing. I connected mine to the SharkBite push fittings.

Patch up the Wall
The great thing with this easy fix-it-yourself is there is not much patching you have to do!
I took the cut-out pieces of sheetrock and trimmed the back of them down, so they were thinner than the original size.

Now that the pieces are cut down and fitting flush against the wall, I take a drywall mud compound and smear on the back to help hold the piece in.
After your pieces are in place, I take a six-inch broad knife and spread a layer of mud (joint compound) onto all the seams. I fill in all the screw holes and any imperfections around the box. I smooth everything around the box and let it dry.
Since my walls have a brocade texture on them. I achieved this match by taking a flat piece of sheet rock and spreading a little bit of mud on the bottom.
I then pressed it lightly onto the wall around the washer box. You don’t want to apply too much pressure. Go in a random pattern to create various-size blobs.

Once there is good coverage around the washer box and extending into the original textured area, you can let it dry for a little bit. Once the mud has begun to set up some, take your broad knife and lightly flatten out the texture. I call this a knockdown texture. Flatten the mud until no sharp points are sticking out from the wall.
Important! Don’t press very hard when knocking down the texture. Otherwise, you will completely flatten the mud and it will not match the original.
Final Product!
With the mud knocked down (flattened), let it dry. You can now paint to match your room color or paint the whole room to spruce it up.
Before

After!
